
Thank you for choosing Kinship for your real estate needs. Our commitment to excellence is evident in every design and development decision we've made. Kinship is not just a theme; it's a culmination of dedication, expertise, and above all, a passion for creating an exceptionally user-friendly experience in real estate WordPress themes. We're excited to be part of your journey!
For assistance, please use our support ticket system. Remember to have your Themeforest product license handy. We are eager to help you out! However, we suggest reviewing this documentation thoroughly prior to submitting a ticket.
Getting Started: Server Requirements
Common problems like a white screen, issues importing demo content, empty page content, and similar issues often stem from low PHP configuration limits. To resolve these, increasing the PHP limits is usually the solution. You have the option to do this yourself, or you can contact your web hosting provider and request that they raise these limits to the following minimum values:
Recommended Server Settings
- max_execution_time: 180
- memory_limit: 128M
- post_max_size: 32M
- upload_max_filesize: 32M
Install Theme
If you're new to WordPress, we recommend reading the official WordPress documentation before installing. It's a valuable resource for beginners. You can find it here: First Steps With WordPress.
There are two methods to install this theme:
- Upload the theme's ZIP file directly via the WordPress theme uploader.
- Use an FTP client to extract and upload the theme to the /themes/ directory in your WordPress installation.
Instructions for WordPress Theme Upload
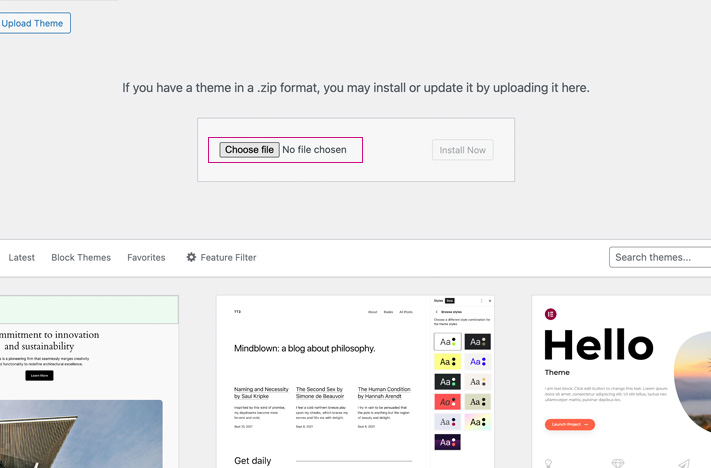
Before uploading the theme, ensure you have the "kinship.zip" file extracted from the ThemeForest download. If you have the 'Installable WordPress file only', this step is not necessary. Uploading the complete ThemeForest ZIP file (which includes all files & documentation) will result in a "Missing Stylesheet" error. Follow these steps for a successful theme upload:
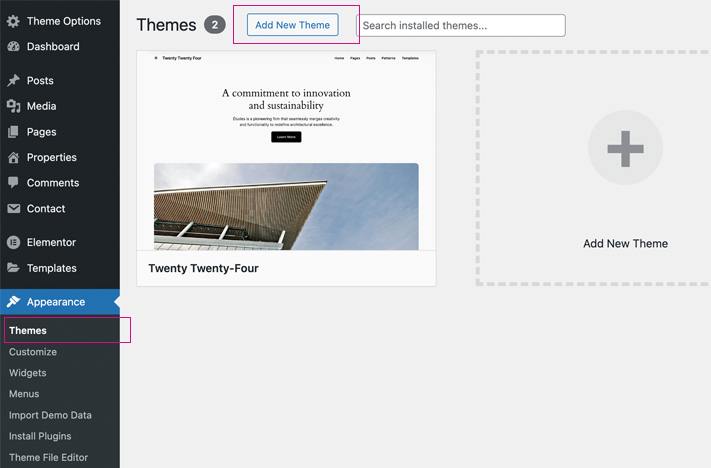
- Login to the WordPress admin area.
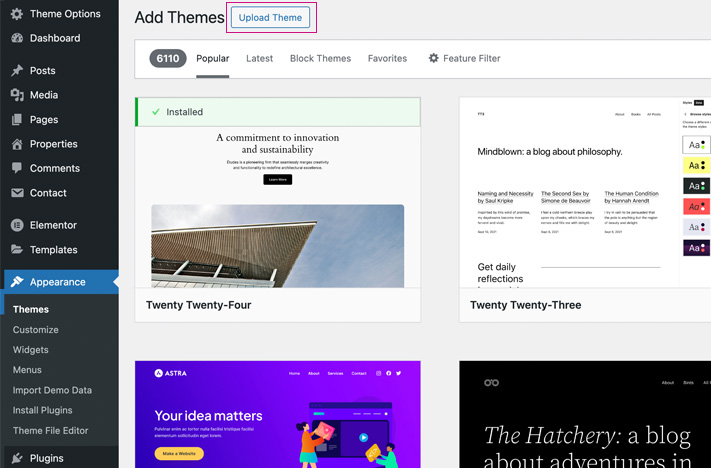
- Go to "Appearance > Themes" and click "Add New Theme".
- At the top of the page, click "Upload Theme".
- Click "Choose File", select the "kinship.zip" file, and then click "Install Now".
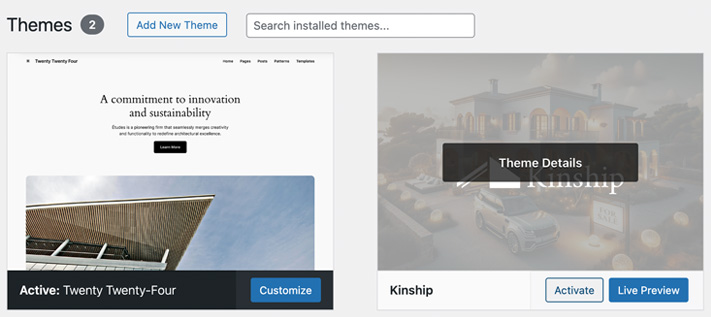
- Upon completion, a success message will confirm your new installation.
- Click the "Activate" link to activate the theme.
- Your theme should now be activated and ready to use. If not, it's possible that a server setting is blocking the installation. Please try the FTP upload method described below instead.
FTP Upload
- Log in to your FTP server and navigate to your WordPress themes directory (wp-content/themes/).
- First, extract the zipped theme file on your computer.
- Upload the extracted theme folder to the themes directory (wp-content/themes/kinship).
- After the upload is complete, log in to your WordPress admin panel.
- Go to “Appearance > Themes”.
- Find your theme and click “Activate” to enable it on your site.
Once you've activated the theme, you can proceed to install the necessary plugins.
Child Theme (Optional)
Using a child theme is highly recommended if you plan to make code changes. This is because updates to the main theme will overwrite your modifications unless you're using a child theme. To set up a child theme, follow these steps:
- Ensure the main theme is installed. (Refer to WordPress upload instructions)
- Navigate to "Appearance > Themes" and click "Add New Themes".
- At the top of the page, click "Upload Theme", then choose the child theme's ZIP file.
- Select "child-theme.zip", and click "Install Now".
- A success message will appear once the installation is complete.
- Click the "Activate" link to enable the child theme.
- Your child theme is now active and ready for use.
- Copy any files from the main theme that you wish to modify into the child theme folder, maintaining the same file structure and names.
- Make your changes to the files and check your site to see the results.
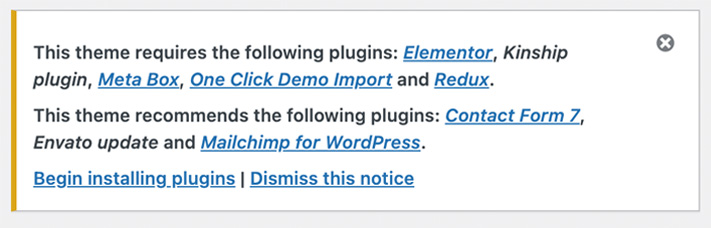
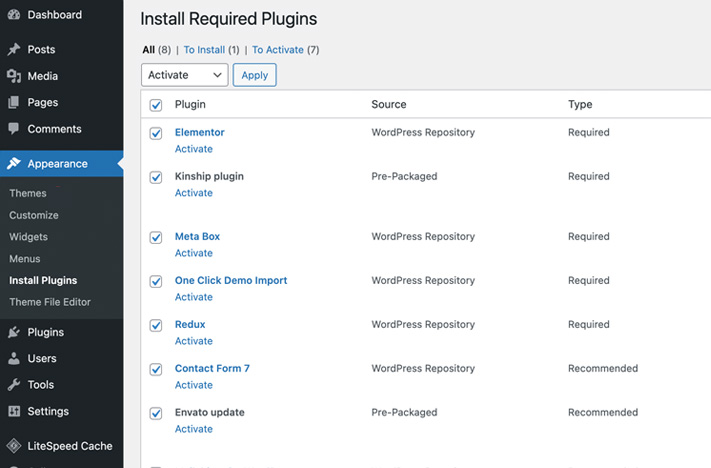
Install Plugins
This theme includes several plugins essential for unlocking all theme features, similar to what you've seen in the demo. Follow these steps to install them:
- Navigate to: "Plugins > Installed Plugins" in your WordPress dashboard.
- A notification will appear at the top of the page indicating the required plugins for this theme, such as 'plugin-x', etc. Ensure you install all these listed plugins.
- Proceed to install each of the recommended plugins.
- Once installation is complete, activate each plugin.

About the plugins
Elementor (required)
Elementor is a WordPress plugin specifically built to help you create custom pages with elements. It's the most popular pagebuilder on the market. You can learn more about Elementor at https://elementor.com/academy/getting-started-with-elementor
Slashdown plugin (required)
The Slashdown plugin mainly extends the Elementor plugin. Custom built Slashdown Widgets can be found at the bottom of all widgets categories when you edit a page in Elementor.
Redux framework (required)
This plugin is required for theme options to work inside the theme.
Meta Box (required)
This plugin is required for custom fields to work inside the theme.
One Click Demo Import (required)
Import your content, widgets and theme settings with one click.
Envato Market
Keep the theme up to date easily.
Contact Form 7
With Contact Form 7 you can easily create custom forms with reCaptcha. You can find documentation at: https://contactform7.com/docs
WooCommerce
This theme supports WooCommerce so you can start your own shop. This theme is supported for WooCommerce. After installation you'll see that it works correctly with the theme and you can start selling your products online. Please find the WooCommerce documentation to learn more.
MC4WP: Mailchimp for WordPress
This plugin helps you grow your Mailchimp lists.
Yoast (optional)
This theme has been optimized for Yoast. Yoast can be used to boost your SEO performance, but is also needed in order to use breadcrumbs. Yoast can be found at: https://wordpress.org/plugins/wordpress-seo
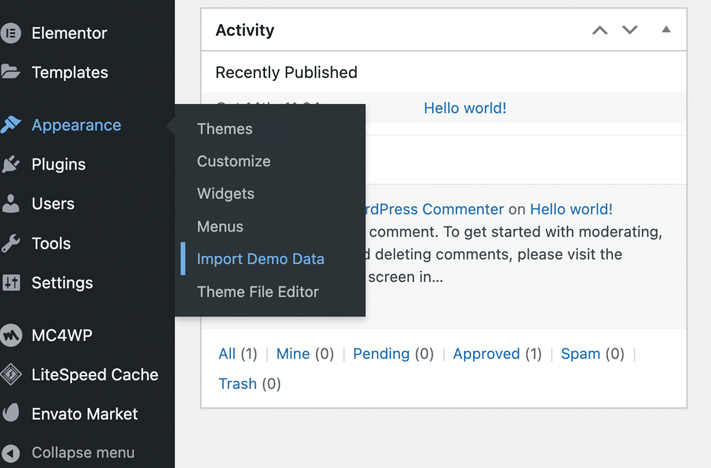
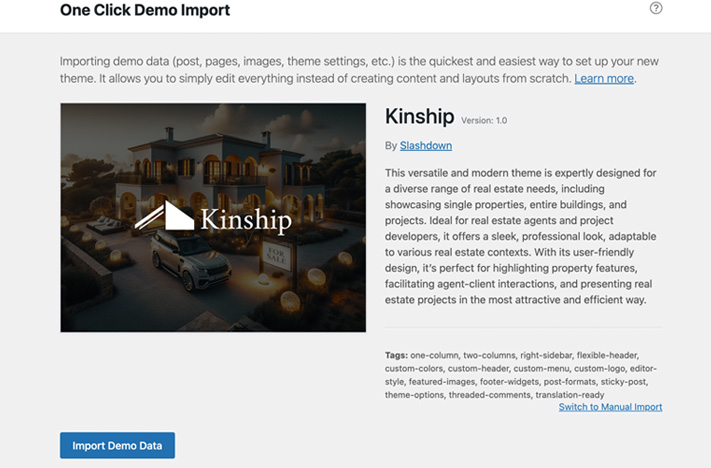
Import Demo Data
Importing demo data is a quick way to set up your site similar to the theme's demo. This data can be customized to your preference or used as-is.
Main WordPress Demo
- Navigate to “Appearance” > “Import Demo Data” in your WordPress dashboard.
- Click on the "Import Demo Data" button.
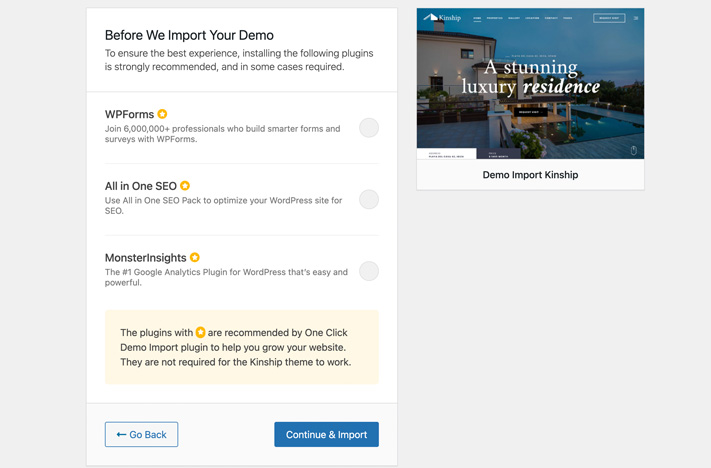
- Opt to deselect any recommended plugins, then click "Continue & Import".
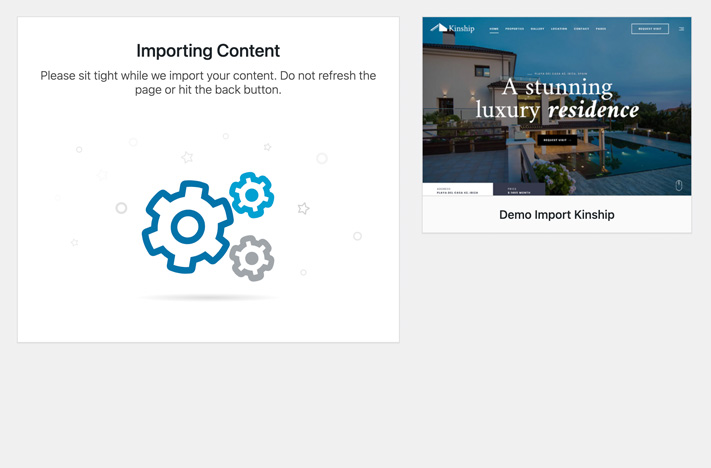
- Allow the import process to complete without refreshing or leaving the page.
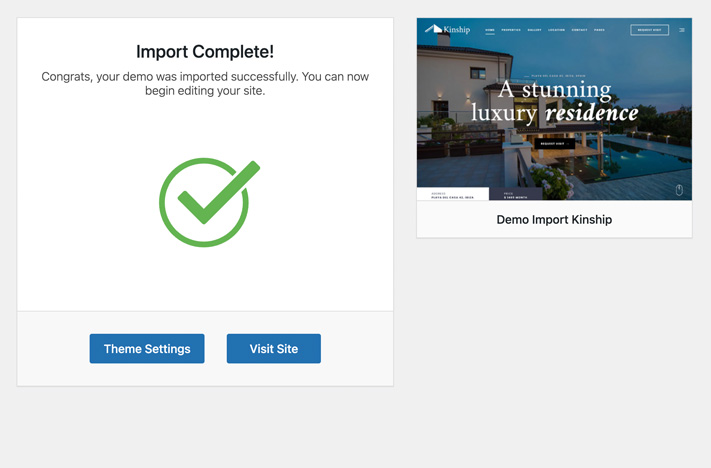
- Once the import is finished, you're all set. Proceed to the "Setup Theme" chapter for further configuration instructions.
Setup Theme
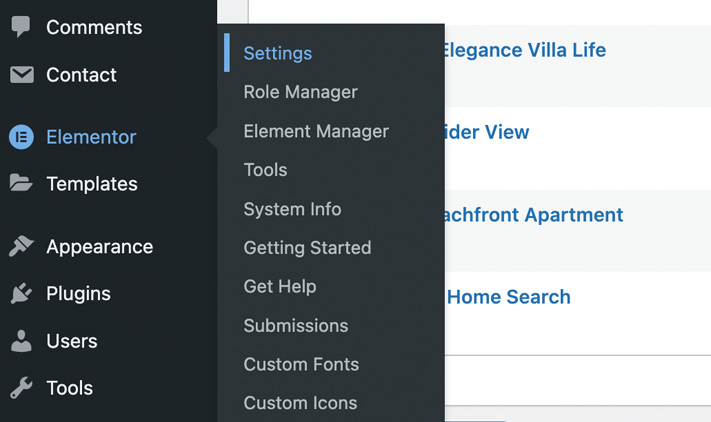
Setup Elementor (Important!)
To ensure the theme options work correctly, you need to disable Elementor's default colors and fonts.
- Go to: "Elementor > Settings".
- Check the boxes for "Disable Default Colors" and "Disable Default Fonts".
- Click "Save Changes".

Default Homepage and Posts Page
After installation, set up your default homepage, as WordPress defaults to using the blog page. To change this:
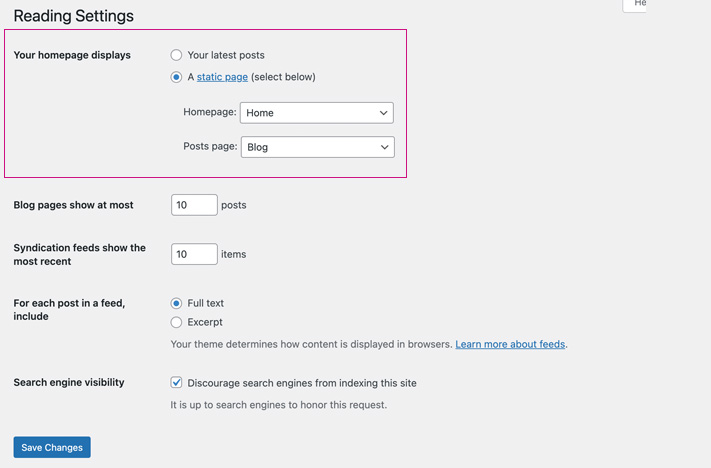
- Navigate to “Settings” > “Reading”.
- Select “A static page (select below)” under “Front page displays”.
- Set "Home" as your “Front page” and "Blog" as your "Posts page".
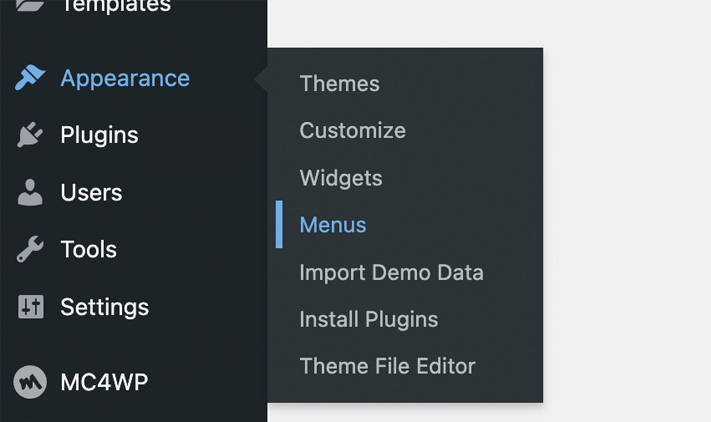
Setup Menu
Create your site's navigation using WordPress's standard menu setup:
Setup Mega Menu
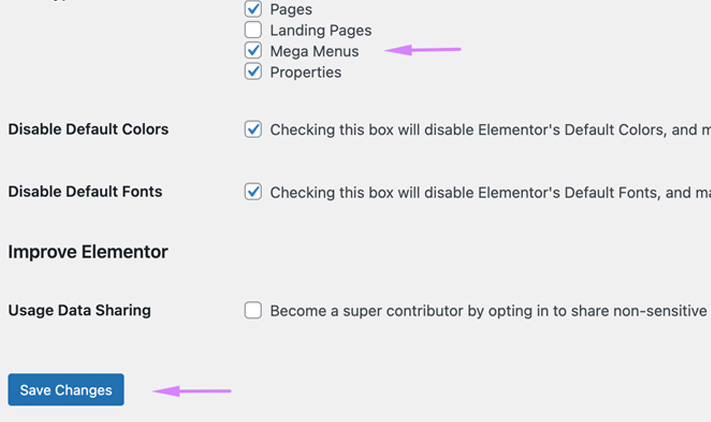
- First, enable Mega Menu in Elementor. Go to: "Elementor > Settings".
- Under post types, ensure the "Mega Menus" box is checked.
- Don't forget to click "Save Changes" to apply your settings.
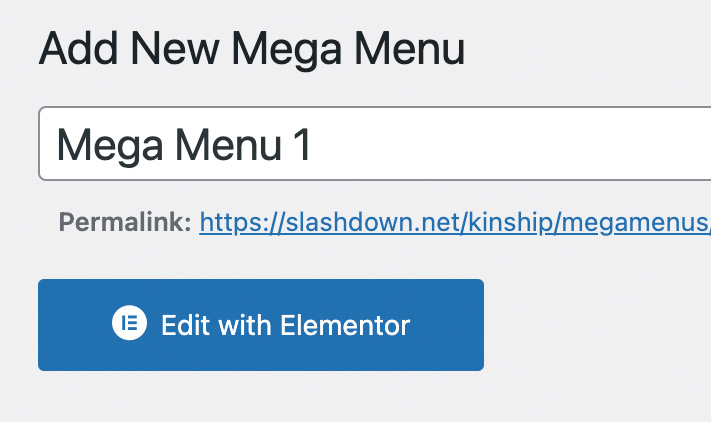
- To create a new Mega Menu, navigate to: "Mega Menus > Add New Mega Menu".
- Give your Mega Menu a name and then click "Edit with Elementor" to start designing it.
- Use Elementor's drag-and-drop interface to build your Mega Menu. Once complete, click "Publish".
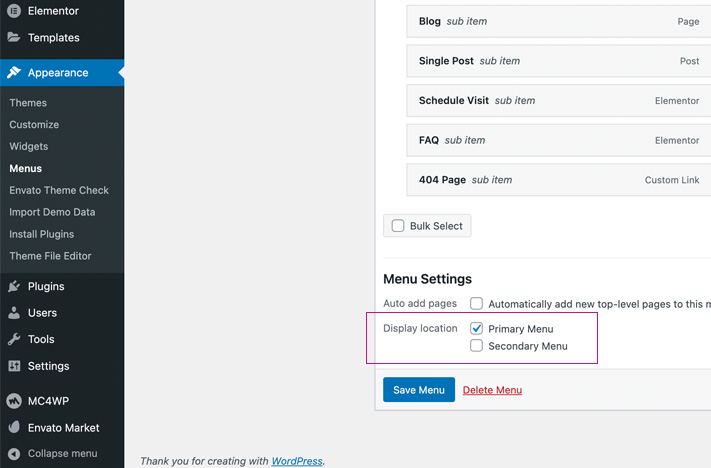
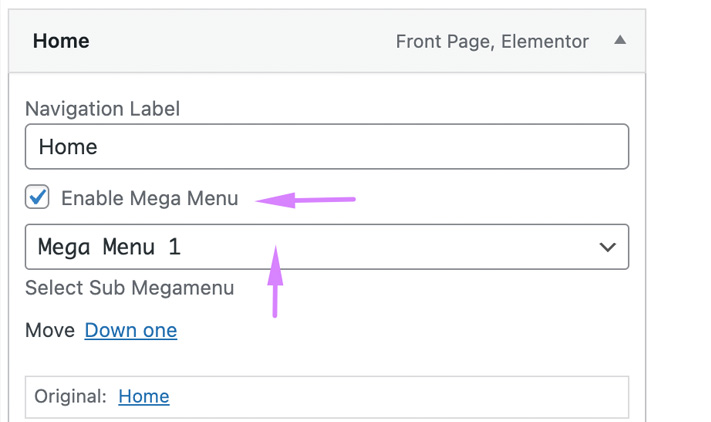
- Integrate your Mega Menu into your site's navigation by going to: "Appearance > Menus".
- Choose your menu, select "Enable Mega Menu", and pick the Mega Menu you created. Remember to save your changes by clicking "Save Menu".
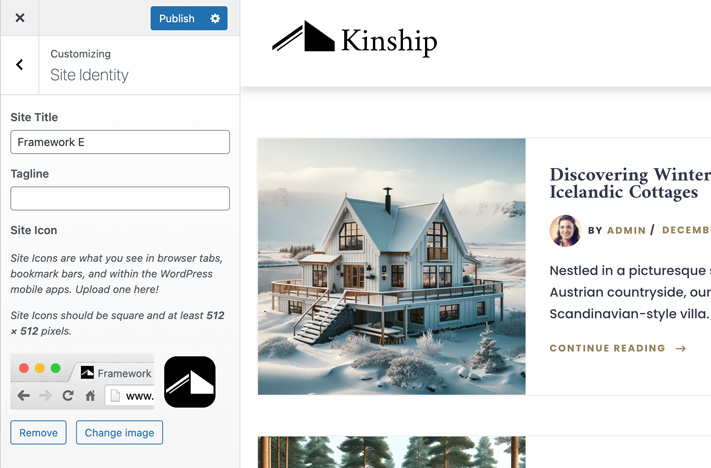
Setup Site Identity
Modify your Site Title and Site Icon, standard features in WordPress, by following these steps:
- Go to: Appearance > Customizer > Site Identity.
Permalinks
Ensure your permalinks are set up correctly:
- Navigate to "Settings > Permalink Settings".
- Select "Post name" or your preferred structure.
- Click "Save Changes".
Footer and Sidebars
Customize widget areas in the theme with these steps:
- Navigate to "Appearance > Widgets" in your WordPress dashboard.
- Here, you have options to expand various sections like footer columns, the default sidebar (blog), and the Hamburger Sidebar (which appears after clicking the hamburger icon in the navigation).
- Add or remove widgets as desired and customize them according to your needs.
- Don't forget to click "Update" to save your changes once you're done.
Theme Options
Find the Theme Options at the top of your admin sidebar. This section allows you to fine-tune various aspects of your site, including:
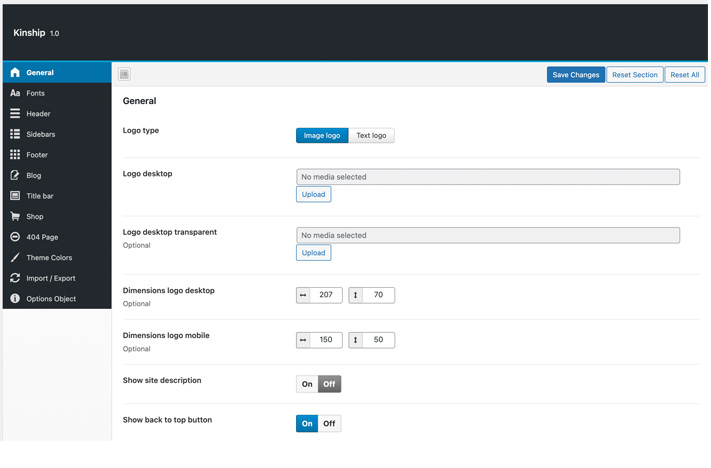
- General: Manage global theme settings, like your site's logo.
- Fonts: Set typography styles for the entire theme.
- Header: Options to customize the navigation and top header area.
- Sidebars: Define sidebar placements and configurations.
- Footer: Customize settings for the main and bottom footer sections.
- Blog: Choose layout styles for your blog pages.
- Title Bar: Adjust the main title bar's appearance.
- Shop: Settings for WooCommerce integration.
- 404 Page: Design your custom error page.
- Theme Colors: Select primary and accent colors for your theme.
- Import/Export: Backup or transfer your theme settings.
Additionally, these options are integrated with the WordPress Customizer (Appearance > Customizer), offering live previews for changes to elements like colors and fonts.
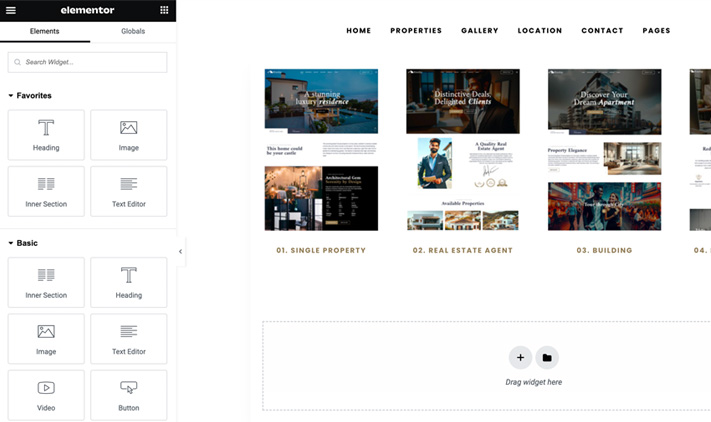
Elementor Page Builder
Kinship utilizes the dynamic and intuitive Elementor Page Builder, an exceptional WordPress plugin transforming website creation and design with its user-friendly drag-and-drop interface. For detailed guidance on utilizing Elementor, refer to the Elementor Documentation.
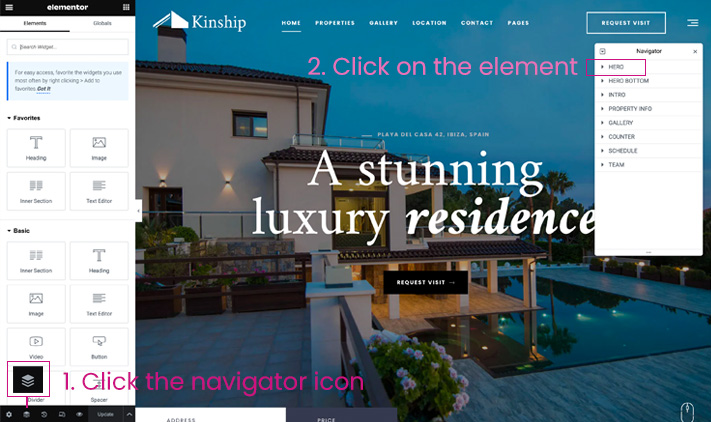
Replace Demo Images
Replacing most images with default Elementor options is straightforward. However, certain images are set as section or column backgrounds, such as heroes and splitters. These can be substituted in the following way:
Replace Section Backgrounds
- Click the navigator icon
- Click on the element in the navigator (hero)
- Click the style tab
- Replace the image

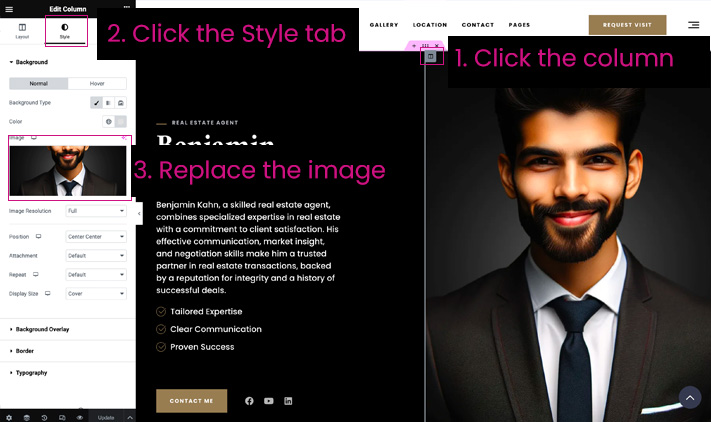
Replace Column Backgrounds
- Click the image column
- Click the style tab
- Replace the image
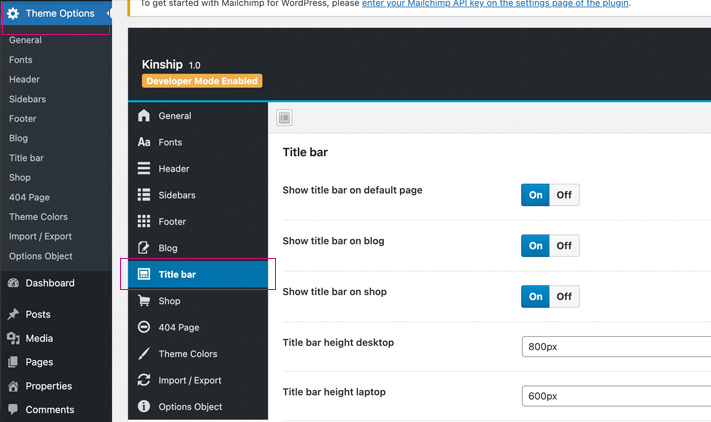
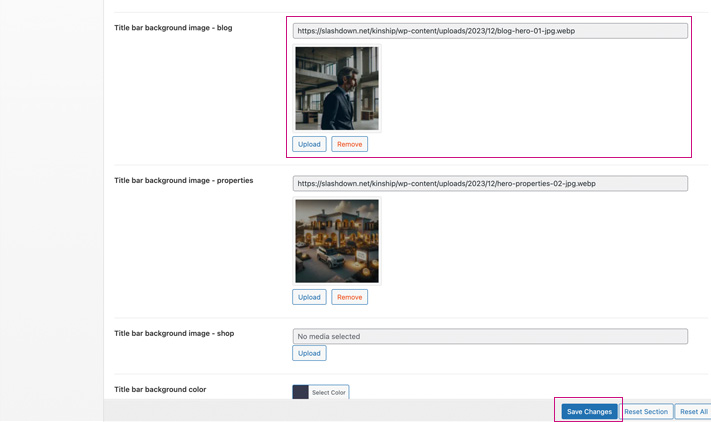
Title Bar Image
There are two methods for implementing title bars: using the default title bars in the theme options, and applying title bars directly on the pages. To modify these, please follow the steps outlined below:
Default Images
- Go to “Theme Options > Title bar”
- Scroll down till you see the title bar images and replace the images.
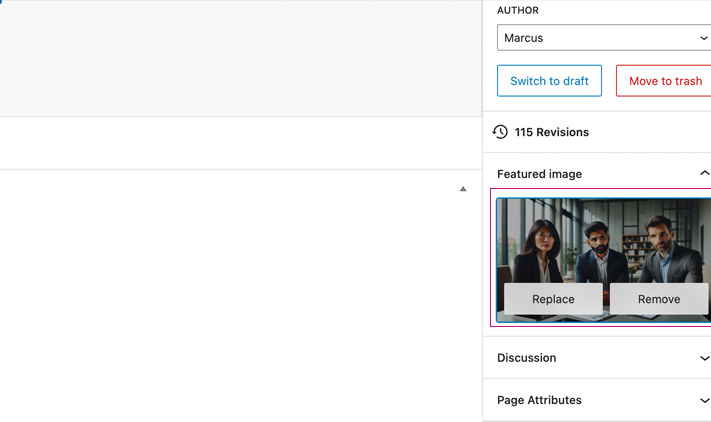
Page Images
- Go to “Pages > All Pages”
- Edit the page
- Replace the featured image
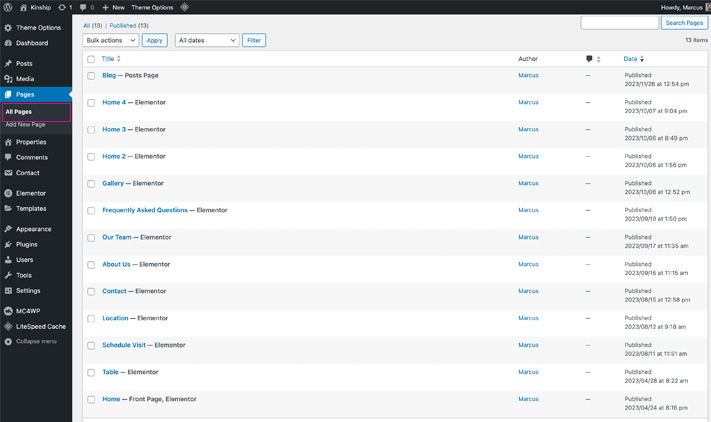
Pages
Creating and designing pages is a breeze with the Elementor plugin included in this theme. To start building a page, follow these steps:
- Navigate to “Pages” > “Add New” in your WordPress dashboard.
- Type in your page title.
- Use the “Edit with Elementor“ button to launch the Elementor page builder and begin customizing your page.
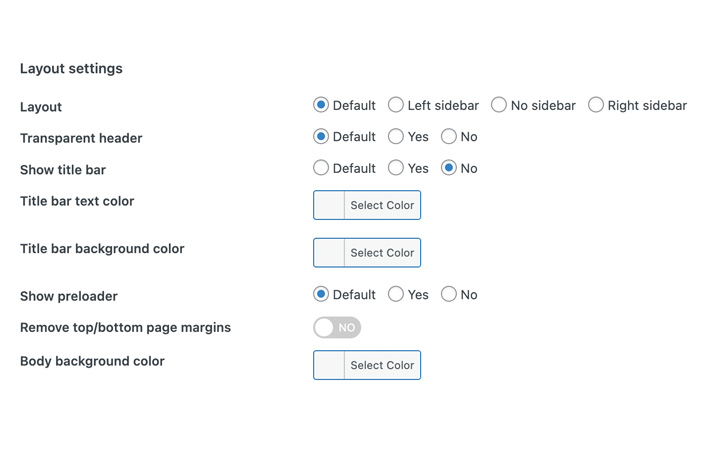
Layout Options
While editing a page, you can adjust its layout settings. These specific settings will take precedence over the global theme settings for that particular page.
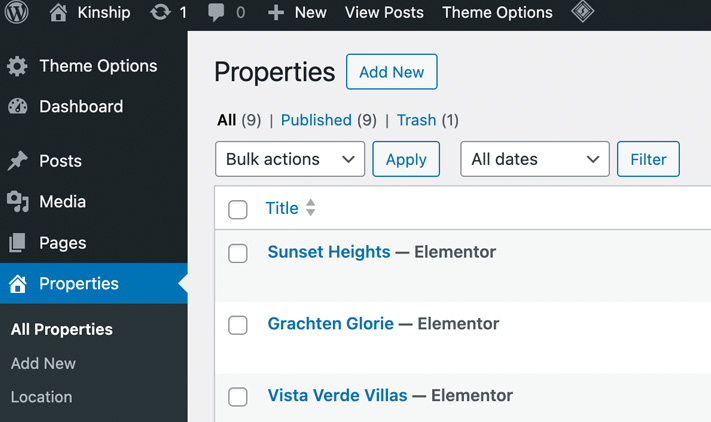
Properties
Creating and designing pages is a breeze with the Elementor plugin included in this theme. To start building a page, follow these steps:
- Navigate to “Pages” > “Add New” in your WordPress dashboard.
- Type in your page title.
- Use the “Edit with Elementor“ button to launch the Elementor page builder and begin customizing your page.
Add a property
To seamlessly add a property to your real estate listing, just follow these simple steps.
- In your WordPress dashboard, navigate to "Properties" > "All Properties" to view your current listings or add a new one. Click "Add New" to start creating a new property.
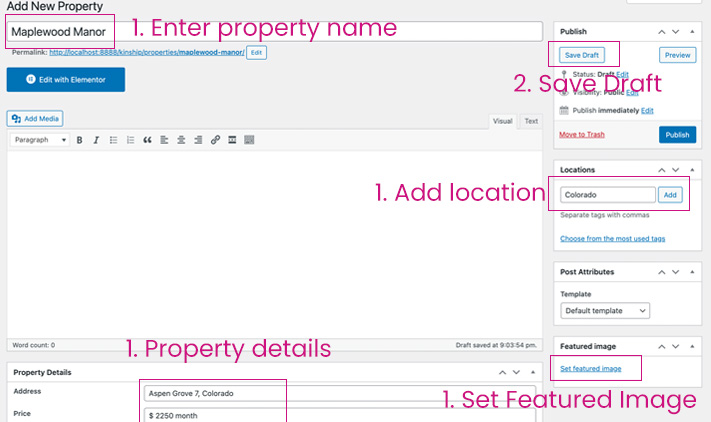
- Input the property name, details, location, and set a featured image. To save your progress, click "Save Draft".
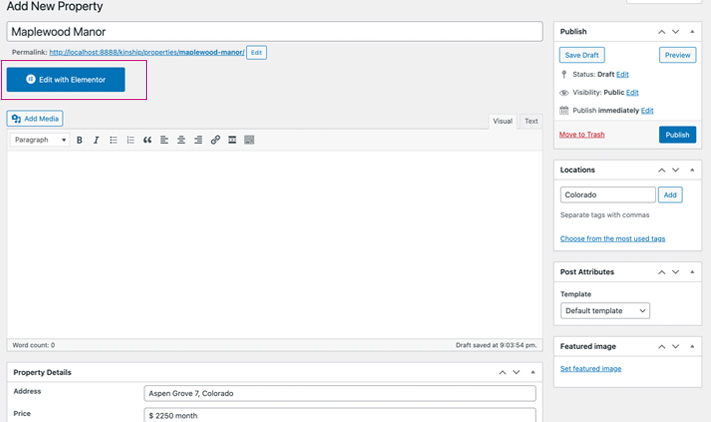
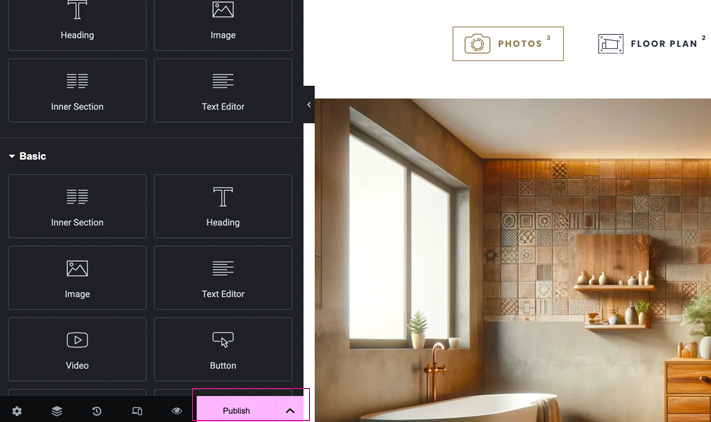
- For detailed editing, click "Edit with Elementor" to open the property page editor.
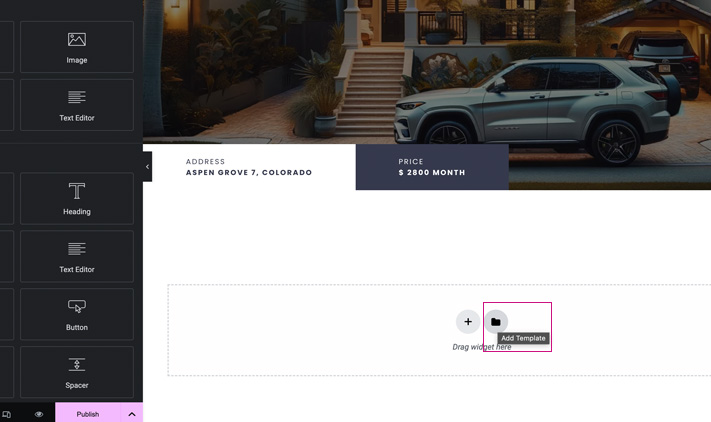
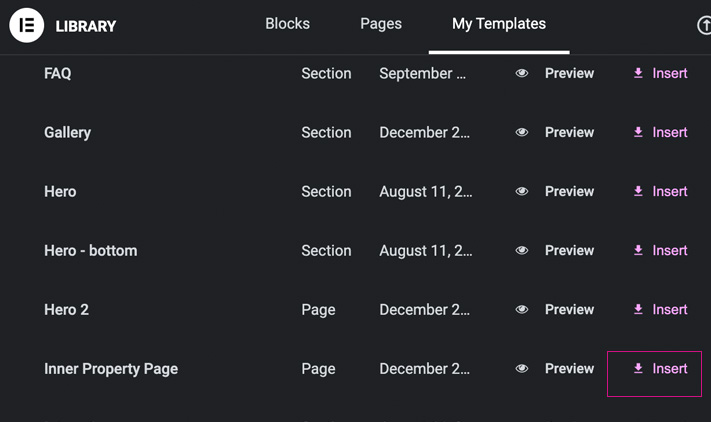
- You will see the name, details, and featured image you added. Now, it's time to design the interior page. Use "Add Template" to access pre-made designs if you've imported the demo, or start from scratch if you prefer.
- Under "My Templates", select and insert the "Inner Property Page" template.
- Customize the elements to suit your needs and hit "Publish" once you're satisfied with the layout.
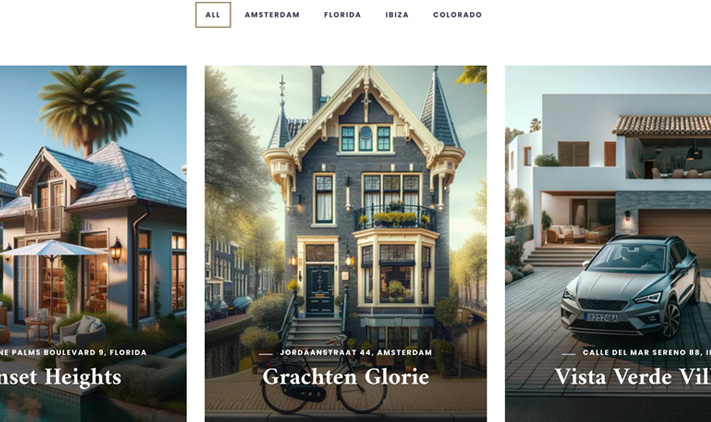
- Your new property will now be showcased on yourdomain.com/properties.
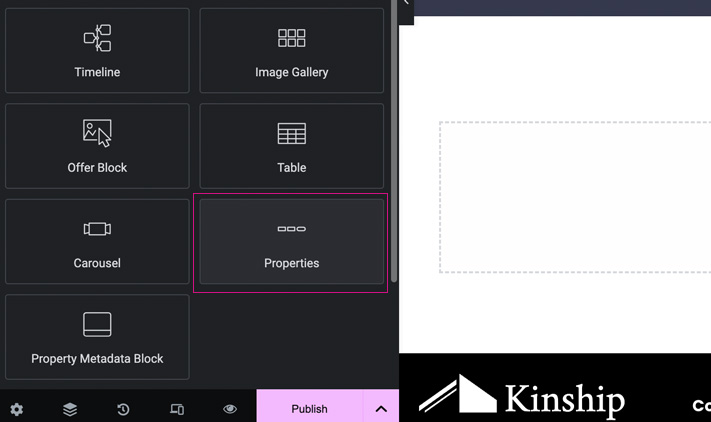
- Additionally, leverage the flexibility of the "Properties" widget. This can be drag-and-dropped into any section of your site.
- Choose the widget's location and specify the number of properties to display. Remember to click "Publish" to apply these changes.

Blog
Embrace the power of storytelling and content sharing with the integrated blog functionality of WordPress, seamlessly adopted by this theme. Whether you're sharing news, stories, or updates, the process is straightforward and user-friendly.
To create a captivating blog post, simply follow these steps:
- Navigate to “Posts” > “Add New” in your WordPress dashboard.
- Enter your post's title and content. Don't forget to categorize it, add tags, choose the appropriate format, and set a featured image to make it stand out.
- Once you're satisfied, click "Publish" to make your post live. You can then preview it to see how it looks to your readers.
Translate
This theme is ready for translation, which means you have the flexibility to use a translation tool to modify text strings within the theme. The theme's translation files can be used for directly altering strings. There are several methods available for string translation. Using Poedit is one such method, and below are the steps for this approach. Additionally, the "Loco Translate" plugin is another recommended option for translation, with its own set of steps for ease of use.
Loco Translate
- Begin by installing the "Loco Translate" plugin. Navigate to the Plugins > Add New section in your WordPress dashboard and search for "Loco Translate".
- Proceed to install and then activate the plugin.
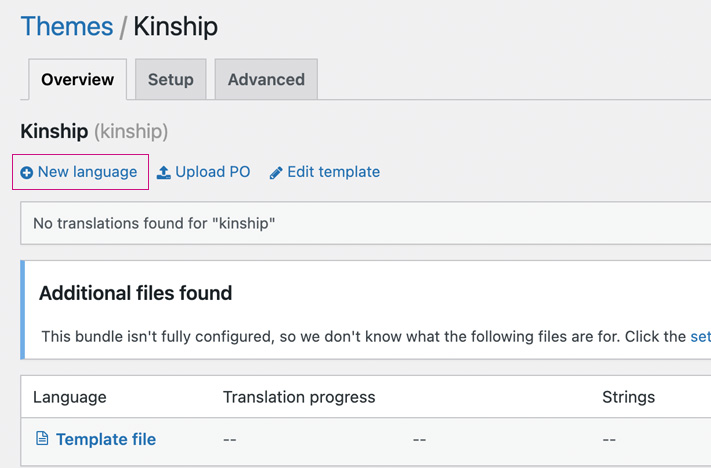
- After activation, go to: "Loco Translate > Themes" and select "Kinship".
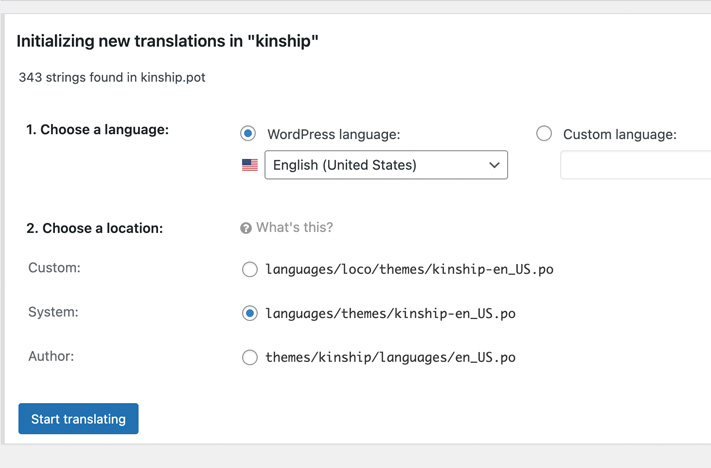
- Choose the option to add a "new language".
- In this step, select your desired language. Ensure you opt for the final option, typically labeled as languages/themes/{locale}.po, as this will save the file in your "wp-content" folder.
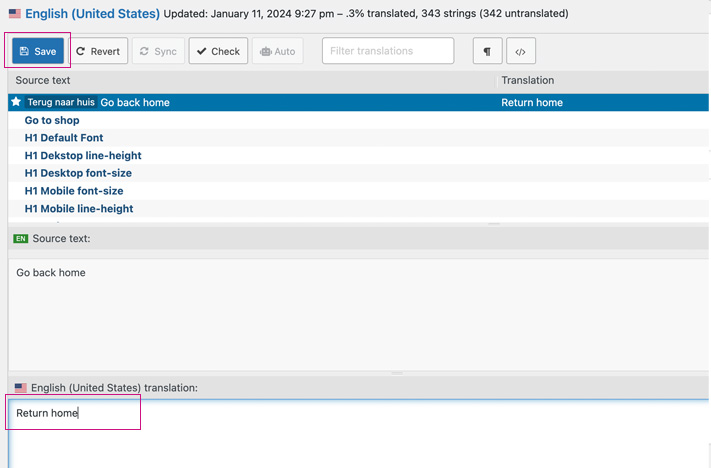
- The plugin is now set for text translation. Simply click on the text you wish to translate, and input your translation.
- To finalize your translations, click the Save button to store your changes.

PoEdit
- Login to your FTP
- Go to '/languages/'
- Copy the ‘.pot’ file to your desktop
- Open the ‘.pot' file with Poedit which you can download (if you don’t have it yet) for free at: https://poedit.net
- When opened you’ll see a list with all various text strings which you can translate in this theme
- Next click strings you want to translate (take note that some of them are only for CMS and some of the text strings are for the front-end, so you don’t have to translate them all)
- Fill in your translation and please make sure you do it in the ‘translation' box.
- The translation will show up on the overview as well (Translation - Language)
- Once you’re done translating your strings, you’ll have to save the file. You need to save the file in a specific way to make sure WordPress will pick up the translation file later on. To define the correct filename we use a language code + a country code. - First you need to find your language code at: https://www.gnu.org/software/gettext/manual/html_node/Usual-Language-Codes.html - Next find your country code at https://www.gnu.org/software/gettext/manual/html_node/Country-Codes.html. Combine these two codes and save it as a PO file (Example nl_NL.po for Dutch or en_EN for English).
- Finally upload this file back into the language folder by FTP: '/languages/'
- Now you still have to activate your language. Go to WordPress Dashboard > Settings - General > Select the Site Language of the file that you’ve just uploaded to your server and hit ’Save Changes’.
Update
Keeping your theme up-to-date is crucial for security and functionality. There are three methods to update this theme to the latest version: using the Automatic update via the Envato Market plugin, WordPress upload, or FTP upload. Choose the method that suits you best.
Automatic Update with the Envato Market Plugin
- Download the Envato Market plugin ZIP file from here.
- Login to your WordPress Dashboard.
- Navigate to Plugins > Add New.
- Click “Upload Plugin” at the top.
- Upload the downloaded envato-market.zip file.
- After installation, activate the plugin.
- Visit the “Envato Market” menu in your dashboard.
- Follow the instructions on the page to enter your API key for automatic updates.
Update via WordPress Upload
Important: Back up any translation files if you have made customizations.
Ensure you extract the "theme.zip" from the ThemeForest download first. Uploading the ThemeForest ZIP file directly will cause a "Missing Stylesheet" error.
- Download the latest version of the theme from ThemeForest.
- Unzip the main file on your computer.
- Login to WordPress and go to “Appearance” > “Themes”.
- Click “Add New” > “Upload Theme” and select the theme file.
- Install and activate the latest version of the theme.
Update via FTP
Reminder: Back up any translation files if you have made customizations.
- Download the latest version of the theme from ThemeForest.
- Unzip the main file to your computer.
- From the unzipped folder, extract the theme's ZIP file.
- Use an FTP application to connect to your server.
- Navigate to /wp-content/themes/ in your server directory.
- Rename the old theme folder for backup purposes.
- Upload the new theme folder.
- Afterward, login to WordPress, go to “Appearance” > “Themes” and ensure the new version is activated.
Credits
Contact
You can get supports through our ticket system with your Themeforest product license. We’ll be happy to help you, but please check this documentation before creating a ticket.